1782228898603 Ca87f20e ChatGPT Image Jun 23 2026 09 33 02 AM

Affordable Teeth Whitening San Diego CA — Gentle, Expert Options for a Brighter Smile

You want a brighter smile without overspending, and San Diego offers several affordable teeth-whitening paths that balance cost, comfort, and safety. You can find effective, budget-friendly whitening options nearby — from supervised take-home kits to in-office treatments with transparent pricing — that deliver real results when matched to your needs.

This post breaks down what stains most commonly cause discoloration, how whitening treatments work, and the safest, most cost-effective choices in San Diego so you can pick the right option with confidence. Expect clear comparisons, practical tips for maintaining results, and signs that mean it’s time to see a dental professional.

What Causes Tooth Discoloration?
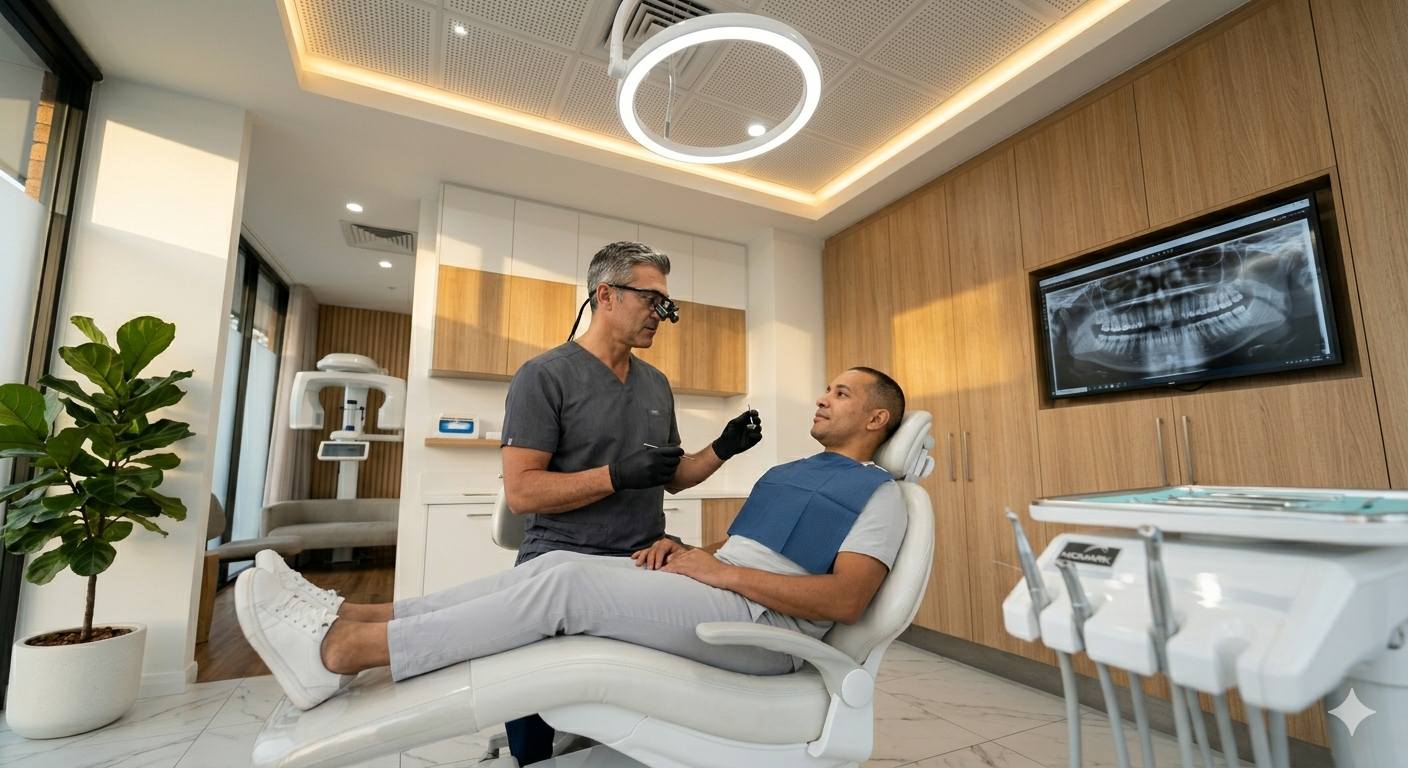
Blog image

Tooth color changes come from surface stains, deeper intrinsic changes, and medical or drug-related effects. Understanding the specific causes helps pick the right whitening option and prevent future staining.

Everyday Habits That Lead to Stains

Coffee, black tea, red wine, and dark sodas deposit tannins and pigments that cling to enamel surfaces. Smoking and vaping leave tar and nicotine residues that produce yellow-brown staining over months or years.

Poor brushing technique and skipping dental cleanings let plaque and calculus build up, which traps pigments and makes stains harder to remove. Acidic foods and beverages soften enamel, making it easier for pigments to penetrate and create longer-lasting discoloration.

Using colored mouth rinses or certain sports drinks frequently also contributes. Cosmetic habits like chewing betel nut or using colored chewing tobacco cause pronounced staining that often needs professional removal.

Natural Aging and Genetics

Enamel thins with age, revealing the darker yellow dentin beneath and making teeth appear more discolored. Lifelong exposure to staining agents compounds this effect, so an older adult often shows combined wear and surface stains.

Genetics influence baseline tooth color and enamel thickness. Some people naturally have thinner, more translucent enamel or naturally darker dentin, which limits how bright whitening can make their teeth.

Enamel wear from grinding (bruxism) or acidic erosion speeds translucency and reveals dentin sooner. Restoration choices should account for age-related changes to set realistic whitening expectations.

Effects of Medications and Health Conditions

Tetracycline antibiotics taken during tooth development cause gray or brown banding that resists standard whitening. High doses of fluoride in childhood can produce white or brown mottling called fluorosis.

Certain antihypertensives, antihistamines, and antipsychotics can cause dry mouth, which increases staining risk because saliva no longer helps wash away pigments. Chemotherapy and radiation to the head and neck may darken teeth by affecting enamel formation or pulp health.

Systemic conditions like liver disease or metabolic disorders can alter tooth color indirectly. Dentists evaluate medical history and, when needed, coordinate with physicians to determine safe, effective whitening or restorative options.

How Teeth Whitening Treatments Work

Teeth whitening removes or breaks down stains inside enamel and on the surface to restore natural brightness. Treatments use specific bleaching agents, applied either by a dentist or at home, and vary in strength, duration, and sensitivity risk.

Safe Bleaching Agents Explained

Dentists most commonly use hydrogen peroxide and carbamide peroxide as bleaching agents.
Hydrogen peroxide acts faster and is typical in in-office procedures at concentrations from about 15% to 40%.
Carbamide peroxide breaks down into hydrogen peroxide and urea, so at-home trays usually contain lower concentrations (often 10–22% carbamide peroxide, equivalent to ~3–7% hydrogen peroxide).

These chemicals oxidize stain molecules inside the enamel and dentin, breaking large pigmented compounds into smaller, less-visible ones.
Professional formulations include stabilizers and desensitizing agents to reduce gum irritation and tooth sensitivity.
Regulated use by a licensed dentist minimizes soft-tissue exposure and ensures correct contact time and concentration, which improves safety and outcome predictability.

Professional vs. At-Home Whitening Methods

Professional in-office whitening uses higher-concentration hydrogen peroxide, a custom tray or isolated field, and monitored application.
Typical protocol: prophylaxis, protective barriers for gums, application of bleaching gel, and light activation in some systems; sessions usually last 45–90 minutes.

At-home options include custom trays prescribed by a dentist, over-the-counter strips, and whitening toothpaste.
Custom trays deliver lower-concentration gel evenly for 30–60 minutes daily over one to two weeks and offer better results than OTC strips.
OTC strips and toothpaste remove surface stains and provide modest lightening; they use lower peroxide levels or abrasives and pose a higher risk of uneven results if misused.
Dentist guidance helps choose the method that balances desired speed, degree of whitening, cost, and sensitivity management.

Typical Results and What to Expect

Initial improvement often appears within a few days for high-concentration in-office treatments and within one to two weeks for dentist-supervised at-home gels.
Most patients see 2–6 shades of lightening, depending on stain type, enamel thickness, and original tooth color.

Intrinsic stains (from tetracycline or trauma) may respond less predictably and sometimes require alternative treatments like veneers or bonding.
Common side effects include temporary tooth sensitivity and mild gum irritation; these usually resolve within days to weeks.
Maintenance involves avoiding staining foods and drinks, occasional touch-up trays or OTC touch-up products, and regular dental cleanings to prolong results.
Patients should consult their dentist to tailor expectations and manage sensitivity or uneven whitening.

Affordable Whitening Options in San Diego

San Diego offers several practical whitening paths that fit different budgets and schedules. Patients can choose quick in-office sessions, dentist-supervised take-home kits, or capitalize on local specials to lower costs.

In-Office Budget-Friendly Treatments

In-office treatments provide the fastest visible results and many clinics in San Diego now offer lower-cost alternatives to premium laser whitening. These typically use professional-strength hydrogen peroxide gels and LED light for one 30–60 minute session, with prices often ranging from $150 to $350 depending on the practice and included follow-up.

Clinics may offer shortened protocols—fewer cycles or lower concentrations—designed to cut cost while still producing noticeable improvement. Those with tooth sensitivity should ask about desensitizing agents applied before or after treatment; many offices include this at no extra charge.

Patients should confirm whether the quoted price covers a consultation, shade assessment, and any protective measures (lip retraction, gingival guards). Transparent pricing prevents surprises and lets patients compare true value between providers.

Take-Home Professional Kits

Take-home kits from a dentist deliver professional bleaching in custom trays and usually cost between $100 and $300 in San Diego. They contain peroxide gel at concentrations higher than over-the-counter strips but lower than in-office gels, and trays are molded to the patient’s teeth for even contact and reduced gum irritation.

Typical protocols run from 1–4 weeks with nightly or daytime wear; dentists tailor wear time to sensitivity and desired shade. Refill syringes are available for ongoing upkeep, which spreads cost over months or years.

Patients wanting predictable whitening should prioritize dentist-provided kits over drugstore products; the custom fit and supervision reduce uneven results and lower risk of soft-tissue burns.

Special Deals and Promotions

Dental practices and medical spas in San Diego frequently run time-limited promotions that cut 10–40% off regular whitening prices. Common offers include bundled discounts (whitening plus cleaning), first-time patient specials, or seasonal promotions tied to holidays and wedding seasons.

Membership plans at some clinics provide discounted procedures and free or reduced-price touch-ups for a monthly fee. Patients should read fine print for exclusions, such as new-patient-only pricing or restrictions on combined discounts.

To find the best deal, compare advertised prices, confirm what services are included, and verify provider credentials. Booking a short consultation while a promotion is active can clarify expected outcomes and any additional costs.

Understanding Treatment Safety and Comfort

This section explains how to reduce sensitivity, ensure a trained clinician applies whitening, and follow gentle aftercare. It focuses on practical steps patients can expect before, during, and after treatment.

Minimizing Tooth Sensitivity

Patients often experience brief sensitivity during or after whitening. A dentist in San Diego will assess enamel thickness and gum recession first to determine if professional whitening is appropriate.

Clinicians commonly use lower-concentration peroxide gels with desensitizing ingredients such as potassium nitrate or fluoride to reduce nerve irritation. Treatments may be staged over multiple short sessions instead of one long exposure to limit sensitivity spikes.

Pre-treatment options include topical desensitizers applied 10–15 minutes before whitening or recommending a toothpaste with 5% potassium nitrate used for two weeks prior. If sensitivity develops, clinicians suggest pausing active whitening, switching to at-home maintenance gels at lower strength, and using soft-bristled brushes to avoid mechanical irritation.

Patients with extensive restorations, active decay, or exposed dentin should discuss alternatives like professional polishing or stain-targeted prophylaxis. Clear communication about expected sensations and a contingency plan for sensitivity helps patients feel safer and more comfortable.

Qualified Professional Application

A licensed dentist or supervised hygienist should perform in-office whitening or prescribe take-home kits. Certification ensures proper diagnosis, appropriate peroxide concentration selection, and correct isolation of soft tissues.

Professional protocols include using protective barriers for gums, eye shields, and precisely measured gel volumes. Dentists also document baseline photos and shade measurements to track results and avoid overtreatment.

Supervised take-home trays are custom-fitted from dental impressions or 3D scans to prevent gel contact with gums and provide even coverage. Technicians follow manufacturer guidelines for wear time and concentration, and dentists review progress during follow-up visits.

Unregulated walk-in booths or over-the-counter strips can cause uneven whitening and gum burns. For predictable, safe outcomes, patients should verify credentials, ask about the peroxide percentage, and confirm a follow-up exam is included.

Aftercare Tips for Gentle Recovery

Immediately after whitening, avoid staining foods and drinks for 48–72 hours: coffee, red wine, dark berries, soy sauce, and tomato-based sauces. Using a straw for permitted beverages reduces contact with front teeth.

Pain management relies on desensitizing toothpaste twice daily and an over-the-counter analgesic if needed. Cold compresses applied externally for 10 minutes can ease brief soft-tissue discomfort from gum irritation.

Maintain excellent oral hygiene with soft brushes and gentle flossing; avoid abrasive whitening toothpastes for two weeks. If the dentist provided a fluoride gel or varnish, use it as directed to help remineralize enamel.

Report prolonged sensitivity, uneven shade, or gum soreness that lasts beyond 7–10 days. The dentist can adjust the regimen, apply professional fluoride, or recommend restorative options if intrinsic discoloration or compromised enamel limits whitening results.

Top Factors When Choosing a Whitening Provider

Choose a provider who combines clinical skill, patient comfort, and honest pricing. Each factor below affects results, safety, and how easy the treatment fits into daily life.

Experience and Training

Look for a provider with formal training in cosmetic dentistry or a dental specialist who performs whitening regularly. Dentists who list continuing education courses in bleaching techniques, laser-assisted whitening, or esthetic dentistry signal up-to-date skills.
Ask how many whitening procedures they perform monthly and whether they handle complex cases like restorations, tetracycline stains, or sensitivity-prone patients. High case volume correlates with predictable outcomes; a clinician who does only a few treatments a year may lack that practice.

Check credentials and before/after photos of actual patients from the practice. Request specifics about the product brands and concentrations used (e.g., 15–35% hydrogen peroxide for in-office systems) and whether they customize protocols by tooth shade, oral health, or existing dental work. Confirm who applies the gel — the dentist or an assistant — and whether shade tracking is documented.

Comfort-Oriented Patient Care

Prioritize clinics that screen for sensitivity risk and tailor the approach accordingly. A responsible provider performs an exam to detect cavities, gum recession, or cracked teeth before whitening, because untreated issues increase pain and reduce effectiveness.
Look for clinics offering desensitizing agents, buffered gels, or phased treatments (shorter sessions spaced over days). These options lower the chance of post-treatment sensitivity while still lightening teeth.

Observe whether the office uses soft-tissue protection, personalized trays, or LED systems that include cooling features. Staff who explain sensations during treatment and provide post-care instructions (avoid acidic foods, use desensitizing toothpaste) improve comfort and satisfaction. Patient reviews that mention minimal sensitivity or staff attentiveness are useful decision points.

Transparent Pricing and Payment Plans

Request a detailed cost breakdown before scheduling: consultation, shade-matching, per-session charges, take-home trays, and any required follow-ups. Some offices advertise “$99 whitening” but exclude the exam or trays; get the full package price in writing.
Compare pricing for in-office single-visit whitening versus professional take-home kits. Typical in-office ranges vary widely; ask what percentage of improvement (number of shades) the practice expects and whether touch-up syringes or maintenance kits are included.

Ask about financing or payment plans if cost is a concern — many practices offer interest-free options or membership plans that lower per-treatment cost. Confirm their refund or retreatment policy if results fall short of expectations. Clear written estimates and a transparent cancellation/rescheduling policy help avoid unexpected charges.

Maximizing and Maintaining Your Brighter Smile

Small, consistent choices keep whitening results longer: protect enamel, reduce new stains, and follow a simple maintenance plan. Practical daily habits, a solid oral care routine, and avoiding specific foods and drinks make the biggest difference.

Daily Habits to Preserve Results

They should rinse or swish with water right after consuming staining items like coffee, tea, or red wine to reduce surface pigments. Using a straw for dark beverages cuts contact with front teeth and limits new discoloration.
Smoking and vaping accelerate staining; quitting shows visible improvement in weeks and benefits overall oral health.

They can schedule touch-up whitening every 6–12 months depending on the original treatment and lifestyle. Over-the-counter whitening pens or dentist-recommended at-home trays work for minor maintenance, but professional consultation avoids overuse and sensitivity.
Wearing a night guard if grinding occurs prevents enamel wear that makes teeth appear duller.

Recommended Oral Hygiene Routines

Brush twice daily for two minutes with a soft-bristled brush and a fluoride toothpaste formulated for sensitivity if bleaching caused discomfort. Use gentle, circular strokes along the gumline to remove plaque without abrading enamel.
Replace the toothbrush every 3 months or sooner if bristles splay.

Floss once daily to remove interdental stains and plaque that can dull whitening results. Add a daily alcohol-free antimicrobial mouthwash to reduce bacteria without drying tissues.
Consider a sonic or electric toothbrush for more consistent plaque control; studies show better stain removal versus manual brushing for many patients.

Foods and Drinks to Limit

Limit coffee, black tea, red wine, cola, soy sauce, and berry sauces that contain strong chromogens which adhere to enamel. When consuming these, pair with water and rinse immediately to reduce staining time.
Tomato-based sauces, curry, and balsamic vinegar can also cause gradual discoloration; moderate portions and prompt rinsing help.

Choose low-staining alternatives when possible: white wine or clear sodas occasionally, and herbal or green teas instead of black tea. For snacks, prefer dairy (cheese, plain yogurt) which can help neutralize acids and protect enamel.
If a favorite item is unavoidable, plan a touch-up whitening session sooner rather than later and discuss safe at-home products with the dental professional.

If they have questions about sensitivity, maintenance schedules, or products, encourage them to contact their dental office for personalized advice and tailored follow-up options.

When to Talk to a Dental Expert in San Diego

If stains return quickly after over-the-counter whitening, a local dentist can identify underlying causes such as enamel wear or deep intrinsic stains. They will explain why at-home products sometimes fail and recommend professional-strength options tailored to the patient’s needs.

If a person has tooth sensitivity, gum recession, or visible enamel defects, consulting a dentist before whitening is important. A dental expert can suggest desensitizing treatments or alternative approaches that protect teeth and reduce discomfort.

People with crowns, veneers, or fillings should seek professional advice because whitening won’t change restorative materials. The dentist can coordinate shade-matching or advise on replacing restorations for a uniform smile.

If someone notices uneven color, dark spots, or staining after trauma or medication use, professional evaluation is warranted. The clinician can determine whether internal staining or other dental issues require specialized treatment.

For safe, affordable choices, patients with budget concerns can ask San Diego clinics about financing, membership plans, or lower-cost in-office and supervised take-home options. A dental team will outline costs, expected results, and realistic timelines.

If a patient simply wants the best, most predictable outcome, scheduling a consultation offers peace of mind. The dentist will assess oral health, discuss expectations, and craft a comfortable, evidence-based whitening plan.

Frequently Asked Questions

This section answers common concerns about cost, methods, longevity, safety, and choosing a provider for teeth whitening in San Diego. Each question gives clear, practical details to help patients decide and prepare.

How much does professional teeth whitening typically cost in San Diego, and what factors affect the price?

Professional in-office whitening usually ranges from $350 to $800 in San Diego, depending on the clinic and the system used.
Take-home tray systems from a dentist commonly cost $200–$400, while over-the-counter kits are $20–$100.

Prices change with the whitening technology, the provider’s experience, and any included follow-up visits.
Additional costs can come from pre-treatment exams, treatments for dental issues first (like fillings), and extra custom trays or touch-up gels.

What’s the difference between in-office whitening, take-home trays, and over-the-counter kits in terms of results and comfort?

In-office whitening delivers the fastest, most noticeable change—often several shades in one visit—because professionals use stronger peroxide and controlled light or laser activation.
Patients typically experience more immediate results but may need a short recovery for sensitivity.

Dentist-prescribed take-home trays use professional-strength gel in custom-fitted trays for gradual, even whitening over one to two weeks.
They balance effectiveness and comfort, with lower sensitivity risk than in-office options.

Over-the-counter kits are least expensive but use weaker formulations and generic trays or strips, so results are slower and less predictable.
They can work for mild staining, but fit and contact with gum tissue often cause uneven whitening or irritation.

How long do whitening results usually last, and what can I do to keep my smile bright longer?

Results commonly last 6 months to 2 years, depending on habits and maintenance.
Smoking, frequent coffee, red wine, and dark foods shorten the effect; avoiding these extends whitening longevity.

Regular touch-ups with dentist-supplied gel every few months helps maintain shade.
Daily good oral hygiene, professional cleanings every 6 months, and using whitening toothpaste or gentle at-home products also prolong results.

Is teeth whitening safe for sensitive teeth, and what options help minimize sensitivity?

Whitening is generally safe but can increase sensitivity temporarily for patients with thin enamel or gum recession.
Dentists assess oral health first and recommend options that reduce risk.

Lower-concentration gels, shorter application times, desensitizing gels, and custom trays can minimize sensitivity.
For severe sensitivity, a provider may suggest postponing whitening or using restorative treatments before proceeding.

Are there any risks or side effects I should know about before whitening my teeth?

Common side effects include temporary tooth sensitivity and gum irritation; these usually resolve within days to a few weeks.
Overuse of whitening products can cause enamel damage or uneven results, especially with poor technique or ill-fitting trays.

Whitening does not change the color of crowns, veneers, or fillings, which may lead to uneven shade after treatment.
Patients with untreated cavities, active gum disease, or certain dental conditions should treat those issues before whitening.

How do I choose a trustworthy whitening provider in San Diego, and what should I look for in reviews?

Look for a licensed dentist offering whitening services, clear pricing, and a pre-treatment exam.
Reviews should mention professional behavior, pain management, and realistic results rather than only low cost.

Check that the clinic explains risks, shows before-and-after photos, and offers follow-up care or touch-up options.
Local dental society memberships, verified patient testimonials, and transparent refund or correction policies add confidence.
1782159342770 911a3b18 ChatGPT Image Jun 22 2026 02 14 38 PM 1

Cost of Dental Implants San Diego CA: Affordable Options, Timeline, and What to Expect

You’re likely wondering what dental implants in San Diego will cost and whether they’re worth the investment. Typical single-tooth implants in San Diego usually range from about $3,000 to $6,000, while full-arch solutions can run $20,000 or more, depending on materials, imaging, and surgical complexity. This post breaks down what drives those numbers, from bone grafts and lab fees to surgeon experience, so you can spot where costs add up.

They’ll explain differences between single-tooth and full-arch options, how insurance and financing can help, and what to ask when choosing a San Diego provider. Expect clear comparisons, realistic timelines, and practical next steps to help you move from price sticker shock to a confident treatment plan.

What Impacts the Price of Dental Implants in San Diego

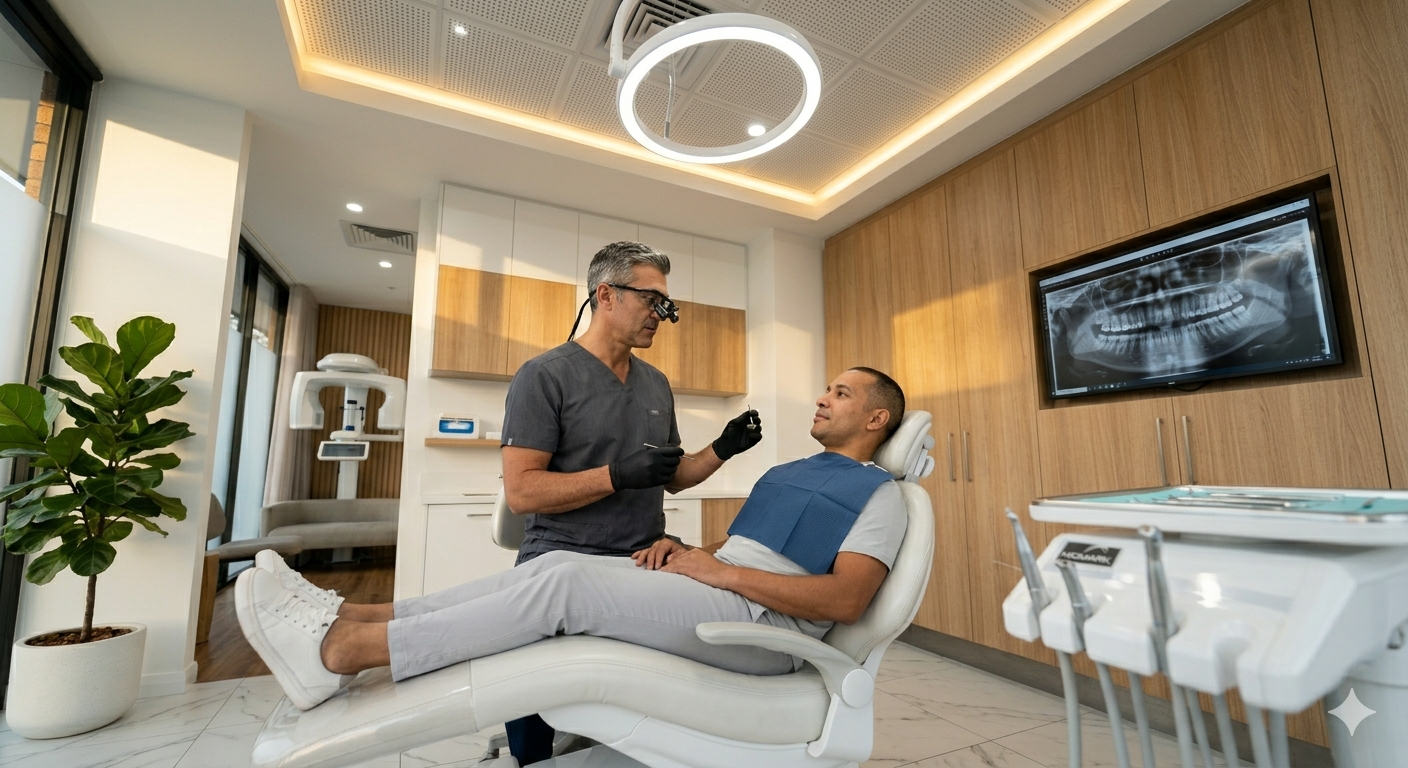
Blog image

Several practical factors drive implant costs: the complexity of the procedure, the materials chosen, and the clinician’s training and experience. Each factor affects both short-term fees and long-term outcomes, so patients should weigh upfront cost against durability and comfort.

Type of Implant Procedure

The number of implants and the surgical steps change the price significantly. A single-tooth implant (one titanium post, abutment, and crown) typically costs less than full-arch replacement with multiple implants or an All-on-4 style restoration. Additional procedures such as bone grafting, sinus lifts, or extractions add separate fees because they increase surgery time and require specialized graft materials or membranes.

Immediate-load implants (tooth placed and restored in one visit) can be more expensive due to lab work and chair time but reduce total appointments. Staged approaches spread costs over months but may require interim prosthetics. Complexity from prior infections, insufficient bone, or compromised soft tissue also raises costs because the surgeon must use extra imaging, longer surgery, or advanced grafting techniques.

Materials Used

Material selection affects both cost and longevity. Titanium implants remain the standard for strength and osseointegration; high-grade titanium alloys cost more than basic titanium but offer proven durability. Zirconia implants are pricier and promoted for aesthetics and metal-free options; they suit patients with metal sensitivities but may require specific prosthetic components that increase lab costs.

Crowns and abutments vary too: porcelain-fused-to-metal (PFM) crowns are less costly than all-ceramic crowns like e.max or zirconia, which provide superior esthetics and stain resistance. Custom milled abutments and CAD/CAM restorations add laboratory fees. Choice of implant brand and warranty also influences price—premium brands with long-term research and support usually charge higher fees.

Dentist’s Experience

Clinician skill and credentials directly affect pricing and outcomes. A board-certified oral surgeon or prosthodontist with years of implant experience typically charges more per implant than a general dentist who places implants less frequently. Higher fees often reflect advanced training, complex-case experience, and reduced complication rates.

Clinics that provide in-house digital planning, cone-beam CT imaging, guided surgery, or sedation options incorporate those costs into the overall price. Practices with strong reputations and many positive patient reviews may charge more, but they can often deliver faster, more predictable results and fewer follow-up complications. Patients should balance cost against qualifications, ask about complication rates, and request itemized estimates.

Breakdown of Common Implant Costs

This section details typical fees patients encounter: consultation charges, the surgical implant and crown costs, and extra services like bone grafts or imaging that often change the final price.

Initial Consultation Fees

Initial consultations in San Diego usually range from $50 to $250 depending on the clinic and included services. Basic exams and treatment planning at a general dentist tend toward the lower end; consultations at specialist practices or implant centers that include CBCT scans and detailed surgical planning sit at the higher end.

Patients should confirm what the fee covers: oral exam, panoramic or cone-beam CT (CBCT), medical history review, and written treatment estimate. Insurance sometimes covers part of the exam but rarely covers CBCT imaging; patients should verify benefits beforehand. Many practices apply the consultation fee toward the total implant cost if treatment proceeds, so asking about fee credit can lower up-front expense.

Surgical and Restoration Charges

Surgical placement of a single endosteal implant in San Diego typically costs between $1,800 and $3,500 for the implant body and abutment. Restorative components—custom abutment plus the final crown—add roughly $1,000 to $3,000 per tooth depending on materials (porcelain-fused-to-zirconia, all-ceramic, or metal-ceramic).

Implant systems, surgeon experience, and whether a board-certified oral surgeon or periodontist places the implant influence price. Sedation or general anesthesia adds $200–$1,000. For multi-tooth bridges or full-arch solutions, expect higher per-unit efficiencies but larger total costs—single implants for multiple teeth can be $3,000–$6,000 each in complex cases.

Additional Services and Preparatory Work

Preparatory procedures commonly affect final cost. Bone grafting to rebuild deficient ridges runs $300–$2,500 based on graft size and material (autograft, allograft, xenograft, or synthetic). Sinus lifts for upper molars add $800–$3,000. Tooth extractions range from $150 for simple pulls to $600+ for surgical removals.

Diagnostic imaging (CBCT) typically costs $150–$500 if not included in the consultation. Temporary crowns during healing are $100–$500. Periodontal therapy to control gum disease can add several hundred dollars. Patients should request an itemized estimate listing each service, the expected timeline, and insurance/financing options to plan accurately.

Comparing Single Tooth and Full Arch Options

This section explains cost differences, surgical complexity, and long-term maintenance for replacing one tooth versus replacing an entire arch. It highlights typical treatment timelines, bone grafting needs, and which option suits specific oral health situations.

Single Tooth vs. Multiple Implants

A single-tooth implant replaces one missing tooth with an implant post, abutment, and crown. Costs in San Diego typically range from $2,500 to $6,000 per tooth depending on the implant system, crown material, and whether bone grafting or sinus lift is needed.

Treatment usually takes 3–6 months from implant placement to final crown if healing is uneventful. Patients with healthy bone and good oral hygiene often avoid grafts, which reduces cost and time. When adjacent teeth are missing, multiple single implants can be placed; this increases stability but raises the total price proportionally.

Pros include preservation of adjacent teeth and superior chewing function. Cons include higher per-tooth cost compared with bridge options and a longer cumulative recovery when several implants are needed. Financing, phased treatment, and dental insurance gaps commonly affect patient decisions.

All-on-4 and Full Mouth Solutions

All-on-4 uses four strategically placed implants to support a full-arch prosthesis, often delivered as a fixed temporary the same day. In San Diego, All-on-4 full-arch treatment typically ranges from $15,000 to $35,000 per arch, depending on lab fees, prosthesis type (acrylic vs. zirconia), and any adjunctive procedures.

This approach shortens treatment time and can avoid multiple individual implants, making it cost-effective for edentulous arches. Bone grafting needs are often reduced because implants are angled to maximize available bone. Patients benefit from immediate function and easier long-term maintenance compared with removable dentures.

Drawbacks include higher upfront cost versus a single implant and the possibility of more extensive revisions if the prosthesis or implants fail. Maintenance includes periodic screw checks and prosthesis relines; full-arch zirconia restorations cost more but last longer and resist staining.

Insurance and Payment Flexibility

Patients often face questions about what insurers cover and how to afford implant treatment. Clear options and realistic cost expectations help them plan treatment without unexpected bills.

Role of Dental Insurance

Most dental insurance plans classify implants as a major restorative procedure and cover only a portion, commonly 10–50% of allowed amounts after deductibles. Annual maximums frequently range from $1,000 to $2,000, which rarely covers a full implant cost in San Diego; patients should verify lifetime or implant-specific limits.

Insurance may cover pre-implant work such as extractions, x-rays, and some bone grafts, but coverage varies by carrier and plan type. Patients should request an itemized pre-treatment estimate (predetermination) from their dentist and submit it to the insurer to learn exact patient responsibility before surgery.

Out-of-network benefits, coordination of benefits for dual coverage, and medical insurance contributions (for medically necessary cases) can change out-of-pocket amounts. The dental office can help file claims, appeal denials, and explain Explanation of Benefits (EOB) statements to reduce surprise costs.

Payment Plans and Financing Choices

Many San Diego practices offer in-house payment plans that split the implant fee into 3–12 monthly payments, sometimes interest-free for short terms. These plans often require a down payment (typically 10–30%) and a signed agreement outlining schedule and any late fees.

Third-party medical/dental lenders like CareCredit, LendingClub Patient Solutions, and Proceed Finance provide longer-term financing up to 60 months with fixed or promotional interest rates. Patients should compare APRs, total repayment amounts, and prepayment penalties before accepting a loan.

Other options include using Health Savings Accounts (HSA) or Flexible Spending Accounts (FSA) for qualified expenses, tapping low-interest personal loans, or arranging phased treatment to spread costs. The dental office can run cost scenarios and monthly-payment examples to help patients choose the most affordable plan.

Choosing the Right Provider in San Diego

Patients should look for a provider who combines proven surgical skill with modern diagnostics and a patient-first office environment. Credentials, implant case history, and on-site technology matter as much as clear price estimates and friendly staff.

Evaluating Qualifications and Experience

Check for a dentist or oral surgeon with specific implant training such as residency in oral surgery, a prosthodontist certificate, or continuing education in implantology. Verify membership in professional organizations (e.g., AAOMS, ICOI) and confirm active state licensure online.

Ask how many implant cases the clinician places per year and request before-and-after photos of similar cases. Inquire about complication rates and how they handle failures or revisions. Look for clinicians who collaborate with restoratively focused dentists when planning bite, esthetics, and long-term function.

Confirm that the provider offers a detailed written treatment plan that lists implant brand, expected timeline, all fees, and maintenance recommendations. Transparent warranties or follow-up care policies indicate professional accountability and reduce unexpected costs.

Office Technology and Comfort Features

Prioritize offices that use cone beam CT (CBCT) scans for 3D implant planning; this improves accuracy for implant size, angulation, and avoiding nerves. Digital impressions and CAD/CAM restorations speed up workflows and often improve fit compared with older analog methods.

Assess surgical environment: on-site sedation options (oral, IV) and adherence to sterile, hospital-grade protocols matter for patient safety and comfort. Look for private treatment rooms, noise-cancelling headphones, and nitrous oxide as signs the practice values patient anxiety management.

Review patient materials and communication: clear cost estimates, financing options, and written postoperative instructions reduce uncertainty. Positive online reviews that mention punctuality, helpful front-desk staff, and straightforward billing often reflect smoother overall experiences.

Long-Term Value of Dental Implants

Dental implants provide durable tooth replacement that preserves jawbone and facial structure while restoring chewing and speech. They require higher upfront cost but often reduce future expenses and complications compared with removable options.

Comparing Implants to Alternatives

Implants replace the tooth root with a titanium post anchored in bone, which prevents the bone loss that occurs after extraction. Fixed bridges restore chewing function but require grinding adjacent healthy teeth and do not stop bone resorption beneath the missing tooth.
Removable dentures cost less initially but need periodic relining, replacement, and may cause sore spots or reduced bite force over time. Implant-supported dentures combine stability with easier cleaning and better chewing efficiency than conventional dentures.

When evaluating lifetime cost, include follow-up visits, possible repairs, and the risk of additional treatments. Studies and clinical experience show that a single implant crown can last 15–25 years or longer with good care, while bridges and dentures typically need more frequent replacement or maintenance.

Maintenance and Expected Lifespan

Daily oral hygiene—brushing twice, flossing once, and using interdental brushes around the implant—reduces the risk of peri-implantitis, the main threat to implant longevity. Regular dental checkups and cleanings every 3–6 months for patients with implants help detect bone loss or inflammation early.
Factors affecting lifespan include smoking, uncontrolled diabetes, bruxism (teeth grinding), and poor bone quality at the implant site. Addressing these risks—smoking cessation, glycemic control, night guards—improves outcomes.

Typical timelines: implant fixtures often last a lifetime; implant crowns usually need replacement every 10–20 years depending on wear. Budget for occasional maintenance: professional cleanings, possible crown replacement, and monitoring X-rays.

Steps for Getting Started

The patient begins by scheduling a consultation with a San Diego dental implant specialist. During this first visit, the dentist reviews medical history, takes X‑rays or a CBCT scan, and discusses goals and budget.

A simple exam determines if bone grafting or tooth extraction is needed first. If additional procedures are required, the clinician explains timelines and costs so patients know what to expect.

Insurance and financing get addressed early to avoid surprises. Many practices offer payment plans, third‑party financing, or in‑office membership plans to spread out costs.

Patients receive a treatment plan that lists procedures, estimated fees, and a projected schedule. This plan helps compare options and secure necessary approvals from insurance or family decision‑makers.

Before surgery, the team provides pre‑op instructions for medications, fasting, and transportation. Clear instructions reduce anxiety and improve recovery outcomes.

On surgery day, local anesthesia, sedation options, and step‑by‑step explanations keep patients comfortable. Post‑op care instructions and a follow‑up schedule are provided to monitor healing and the next restorative steps.

Questions are encouraged at every stage to ensure patients feel informed and confident. They should call the office or request a consultation to discuss individualized pricing, payment options, and appointment availability.

Frequently Asked Questions

This section answers common cost and treatment questions about dental implants in San Diego, with concrete price ranges, typical inclusions, insurance tips, affordable options, and procedural add-ons that change total cost.

What factors most affect the price of a dental implant treatment plan in San Diego?

Location-specific fees, clinician experience, and clinic overhead matter. Private practices in central San Diego typically charge more than suburban clinics.

The implant brand, type (endosteal vs. zygomatic), and material (titanium vs. zirconia) change costs. Premium brands and custom components raise the price.

Diagnostic work and technology also influence cost. Cone-beam CT scans, guided-surgery templates, and lab-fabricated prosthetics increase fees.

Health-related variables affect complexity and expense. Bone quantity, gum health, and systemic conditions (like diabetes) can require additional procedures that add cost.

What’s typically included in a dental implant quote—implant, abutment, crown, and follow-up visits?

Most detailed quotes list the implant fixture, abutment, and final crown separately. Some clinics bundle them into a single “implant package” price.

Pre-treatment diagnostics (exam, X-rays, CBCT) may or may not be included. Confirm whether imaging and consultations are part of the quoted fee.

Follow-up visits for healing checks and minor adjustments are often included for a set period. Extended warranties or long-term maintenance plans can carry extra charges.

Lab work and temporary crowns may be itemized. Ask whether temporary restorations, lab fees, and sedation are covered or billed separately.

How does dental insurance usually help with implant treatment, and what should I ask my provider?

Many dental plans consider implants elective and do not cover the implant fixture. Policies often provide partial coverage for the crown or restorative portion instead.

Request a benefits breakdown: coverage amounts for implants, crowns, diagnostics, and pre-/post-op visits. Ask whether the plan has annual maximums, waiting periods, or missing-teeth clauses.

Confirm whether the insurer requires predetermination of benefits. A predetermination gives a written estimate of covered amounts before treatment begins.

Check network rules and claim submission procedures. In-network providers may accept assignment of benefits; out-of-network claims often require patient submission and later reimbursement.

Are there affordable ways to get implants, such as dental schools, community clinics, or in-house financing?

Dental schools often offer reduced fees with care delivered by students under faculty supervision. Wait times are longer, but costs can be 30–60% lower.

Community clinics and nonprofit programs sometimes provide sliding-scale fees or grant-funded care. Availability in San Diego varies by organization and funding cycles.

Many private practices offer in-house financing or third-party medical/dental loan options. Look for transparent interest rates and total-cost comparisons.

Some practices provide phased treatment or hybrid solutions (implant-supported partials) to spread cost. Patients should compare long-term value and maintenance needs.

How much do full-arch options like All-on-4 or full mouth implants generally differ in cost from single implants?

Single implant treatments in San Diego typically range from $2,000 to $5,000 per tooth, depending on components and lab work. Prices fluctuate by clinic and materials.

Full-arch solutions (All-on-4) commonly run between $20,000 and $35,000 per arch in San Diego. These systems replace an entire upper or lower arch with a fixed prosthesis on four to six implants.

Full-mouth reconstructions (both arches) cost proportionally more but can be more cost-effective per tooth than multiple single implants. Complexity, materials, and provider expertise create the largest price variance.

What extra procedures might I need (like bone grafting or sinus lift), and how could they change the overall price?

Bone grafting for deficient ridges commonly adds $300–$3,000 per site. Minor grafts are at the lower end; block grafts and large reconstructions cost more.

Sinus lifts for upper back implants typically add $1,000–$4,000. Lateral window sinus augmentation and staged procedures increase both time and expense.

Soft-tissue grafts to improve gum contours or seal implant sites add several hundred to a few thousand dollars. These affect esthetics and long-term implant health.

Extraction of infected or retained roots, guided bone regeneration, and staged implant placement all increase total cost and treatment time. Patients should get a written treatment plan listing potential add-ons and their prices.

If they have questions or want a specific estimate, the practice can run an individualized plan and benefits check.

1775139106140 32516852 Gemini Generated Image Qi5d75qi5d75qi5d

Best Teeth Whitening Options San Diego CA — Guide to Safe, Comfortable, and Effective Treatments

You want a brighter smile and need practical options in San Diego—this article guides you to the most effective choices, from in-office professional whitening to reliable at-home solutions and safe over-the-counter products. If you need the fastest, most noticeable results with dentist supervision, in-office professional whitening in San Diego offers the best balance of speed, safety, and predictability.

A local dental expert will help you compare treatments, understand risks and costs, and prepare for your appointment so you get comfortable, lasting results. Expect clear guidance on long-term care, when to consult a specialist, and which OTC products are worth trying before booking a professional visit.

Understanding Teeth Whitening Treatments

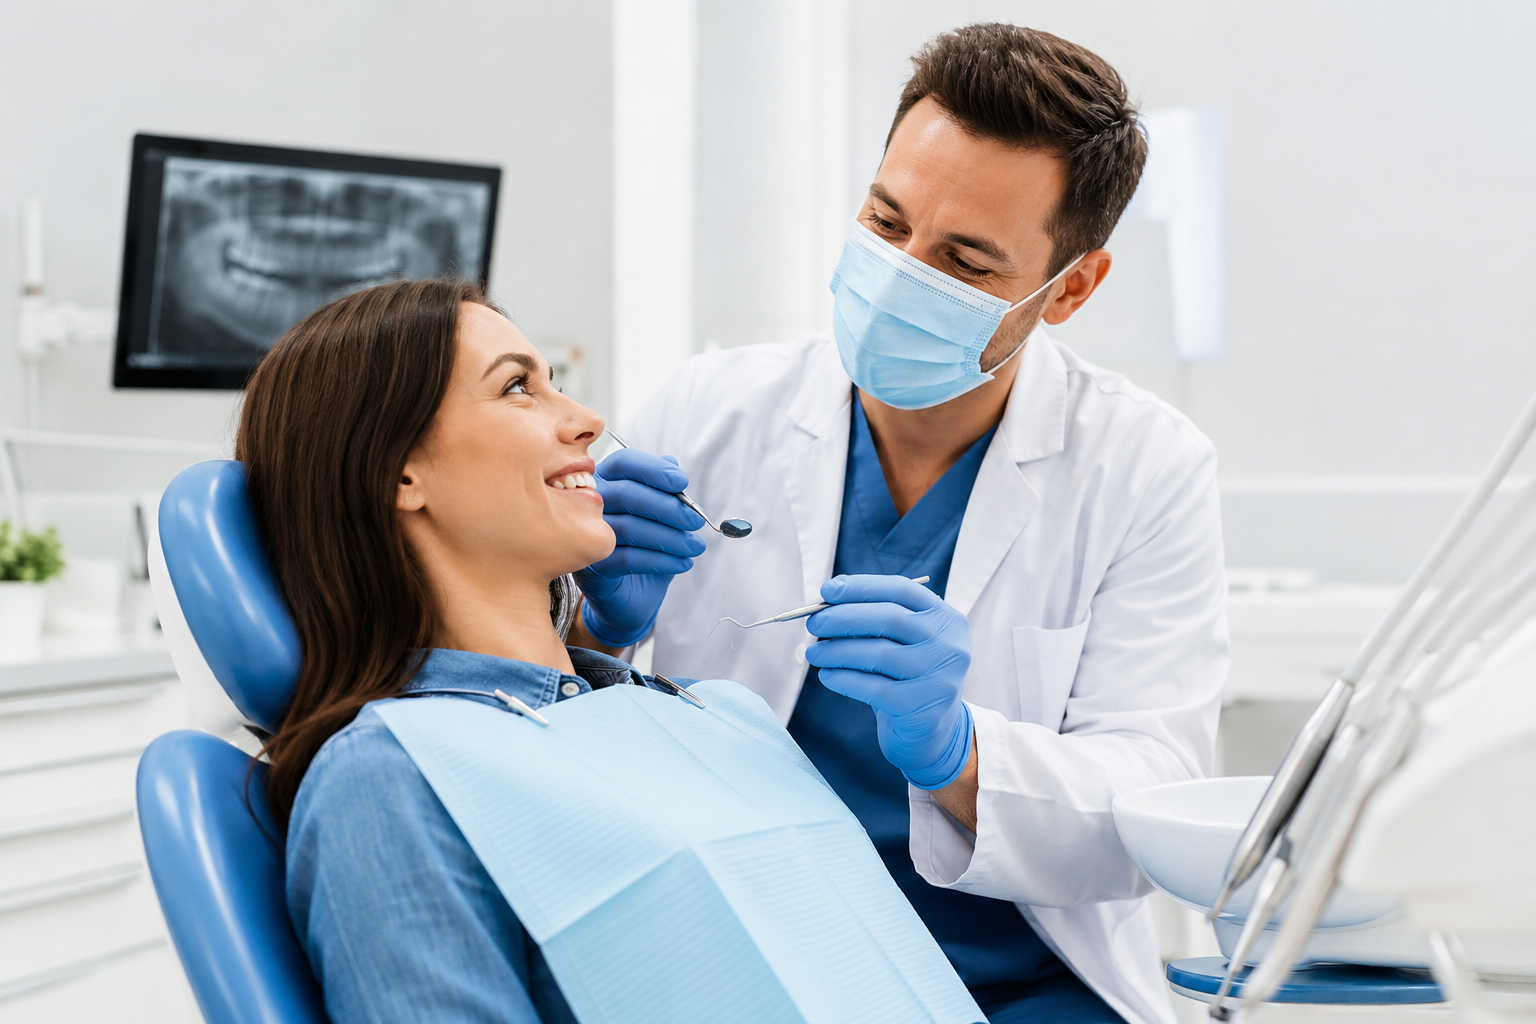
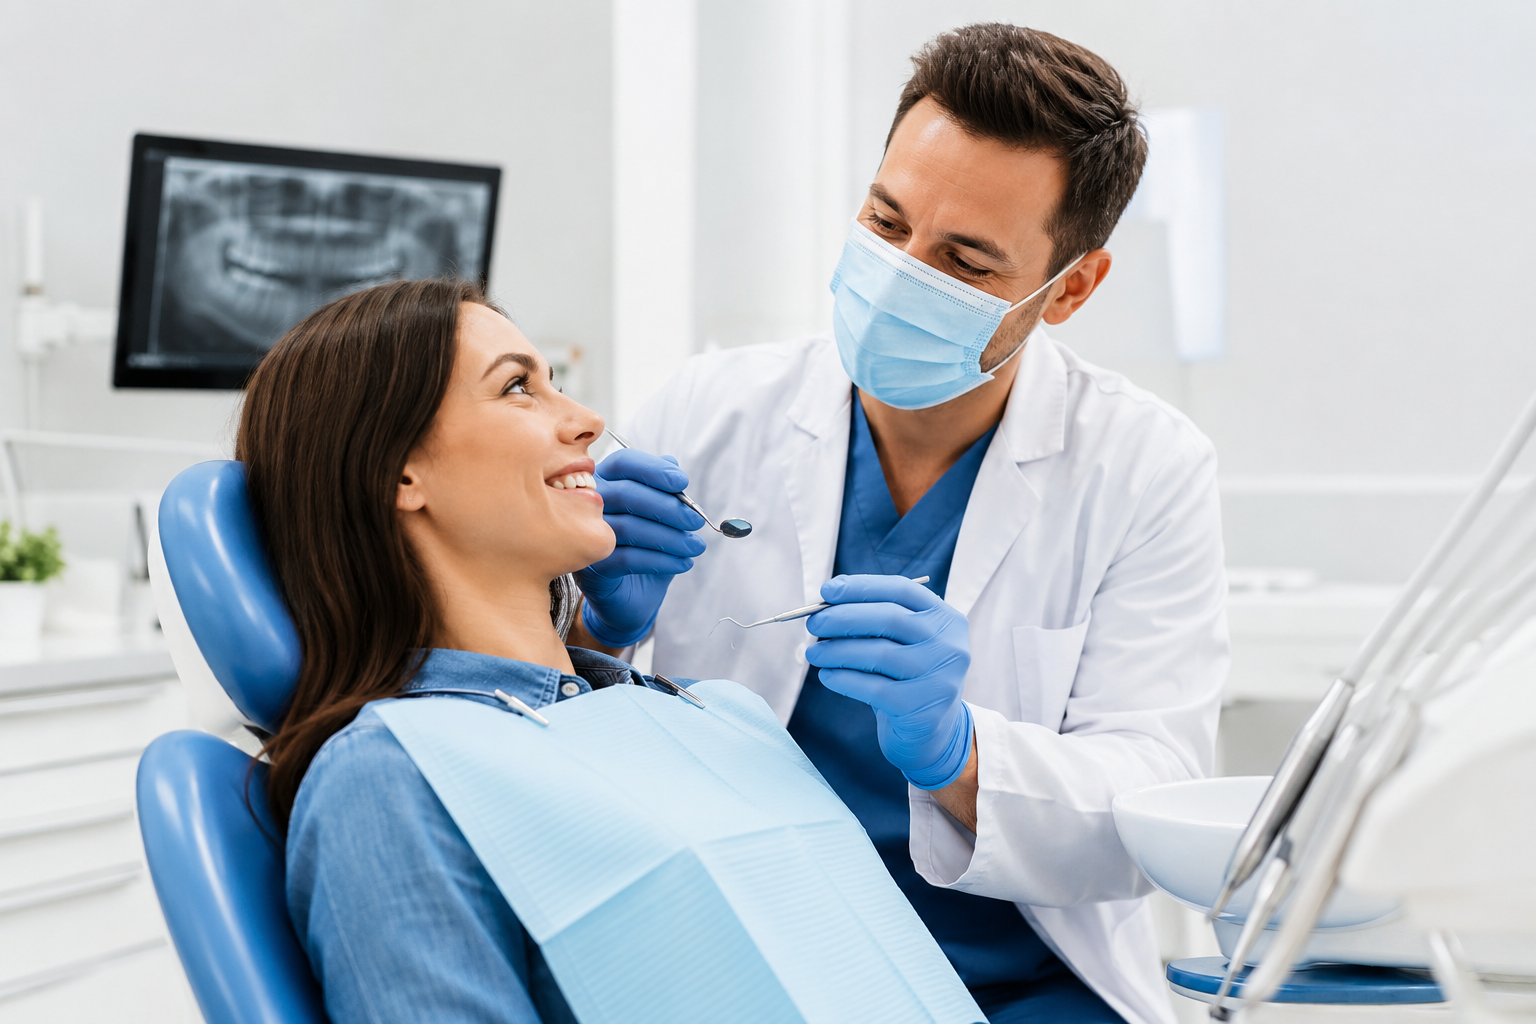
Blog image

Teeth whitening removes or reduces discoloration using peroxide-based agents, professional trays, or laser-accelerated systems. Effectiveness depends on stain type, enamel condition, and realistic expectations about shade change.

How Teeth Stains Develop

Stains fall into two main categories: extrinsic and intrinsic. Extrinsic stains sit on enamel and come from coffee, tea, red wine, tobacco, and colored foods. These respond well to professional cleanings and peroxide-based whitening.

Intrinsic stains form inside the tooth from trauma, certain medications (like tetracycline taken in childhood), excessive fluoride during development, or aging. These stains are harder to lighten and may need stronger in-office whitening, internal bleaching for root-treated teeth, or cosmetic veneers if whitening is insufficient.

Enamel thickness and natural tooth color affect results. Thinner enamel may reveal a darker dentin layer, limiting achievable whiteness. A dentist evaluates enamel health and stain type with clinical exam and dental history before recommending a treatment plan.

Who Is a Good Candidate for Whitening

Ideal candidates have healthy teeth and gums, no active decay, and realistic expectations about shade improvement. People with widespread extrinsic staining from diet or smoking see the most predictable results.

Those with large restorations, crowns, or bonded veneers should know these materials do not whiten; restorations may need replacement to match bleached teeth. Patients with gum disease, untreated cavities, or tooth sensitivity require treatment first. Pregnant or breastfeeding patients are usually advised to delay whitening.

Teens should be assessed for completed tooth development before bleaching. A dental exam, X-rays if indicated, and a discussion of goals help determine the safest, most effective approach.

What to Expect During Procedures

In-office whitening typically uses 25–40% hydrogen peroxide gel applied to exposed teeth with gingival protection. A single 45–90 minute visit can produce several shades of lightening; some practices use a light or laser to accelerate the process. Sensitivity during or after treatment is common but usually temporary.

Take-home trays involve custom-fitted trays and lower-concentration carbamide peroxide gel used for 30–90 minutes daily over one to two weeks. Results develop gradually and allow more control over shade. Over-the-counter products like strips offer milder whitening and variable results.

Dentists assess sensitivity risk, protect gums, and provide post-care instructions—avoid staining foods for 48 hours, use desensitizing toothpaste, and schedule follow-up to check results and plan maintenance.

Professional Whitening Services in San Diego

San Diego offers a range of professional whitening choices that balance speed, comfort, and long-term results. Patients can expect in-office options for immediate improvement and custom take-home systems for gradual whitening, all supervised by licensed dental professionals.

In-Office Whitening Procedures

In-office whitening uses higher-concentration bleaching agents applied by a dental professional for fast, predictable results. Treatments typically use 15–40% hydrogen peroxide or equivalent and take 45–90 minutes, often producing noticeable lightening in a single visit.

Clinics commonly pair the gel with protective barriers for gums and, sometimes, a LED or laser light to accelerate the chemical reaction. This approach suits patients who want a dramatic change before an event or those who need supervision due to sensitivity or restorations.

Typical outcomes range from 2–8 shades lighter depending on initial discoloration and cause (staining vs. intrinsic discoloration). Dentists screen for cavities, gum disease, and tooth restorations first, since those factors affect both safety and visible results.

Custom Take-Home Whitening Kits

Custom take-home kits provide a middle ground: dentist-made trays fit the patient’s teeth, and lower-concentration gel is used over days to weeks. Trays are made from impressions or digital scans to ensure even contact and to reduce gum irritation.

Patients usually wear the trays for 30 minutes to overnight, depending on gel strength. The supervised, gradual protocol reduces sensitivity and offers more control over final shade compared with over-the-counter strips.

Dentists advise a treatment plan, monitor progress, and provide boosters or touch-up gels for maintenance. Custom kits work well for people with mild to moderate staining, frequent coffee or wine consumption, or who prefer a slower, controlled approach.

Safety and Effectiveness of Professional Options

Professional whitening is generally safe when performed or supervised by a licensed dentist; proper assessment prevents complications. Dentists check for enamel defects, tooth decay, gum disease, and incompatible restorations before recommending a protocol.

Common side effects include transient tooth sensitivity and mild gum irritation; these typically resolve within days. Dentists can lower gel concentration, shorten application time, or prescribe desensitizing toothpaste to manage symptoms.

Effectiveness depends on stain type, existing restorations, and patient adherence to post-treatment care. Composite fillings and crowns do not whiten, so dentists may plan restoration replacement after bleaching to match new tooth color. They recommend periodic touch-ups and avoiding staining foods to extend results.

Comparing Over-the-Counter Products

These options balance cost, convenience, and expected results. Readers should weigh how quickly they want whitening, sensitivity risk, and whether they need spot treatment or full-mouth whitening.

Whitening Strips and Gels

Whitening strips and gels use peroxide-based bleaching agents (commonly 6–10% hydrogen peroxide or equivalent). They deliver noticeable shade improvement in 1–2 weeks for surface and some deeper stains, especially from coffee, tea, and tobacco.

Application varies: strips adhere directly to teeth for 30–60 minutes daily, while gels go into reusable trays or brush-on applicators for shorter or guided times. Strips usually provide more uniform coverage than brush-on gels, but gels can target isolated spots or upper/lower arches separately.

Common side effects include tooth sensitivity and mild gum irritation; sensitivity often peaks early and subsides after treatment ends. People with exposed roots, recent restorations, or active gum disease should consult a dentist before use. For best results, follow product instructions, avoid acidic or strongly pigmented foods during treatment, and combine with good oral hygiene.

Whitening Toothpaste and Rinses

Whitening toothpastes use abrasives and low concentrations of chemical agents (typically <1% hydrogen peroxide) to remove surface stains. They brighten teeth gradually over weeks by polishing and preventing new surface staining rather than changing intrinsic tooth color.

Whitening rinses contain peroxide and can reach between teeth and along the gumline where a brush misses. They require daily use for 2–3 months to see modest improvement and work best as adjuncts to strip/gel treatments rather than as standalone solutions for deep staining.

Both formats produce minimal sensitivity compared with peroxide treatments but offer less dramatic results. They suit maintenance after professional whitening, prevention of new stains, or patients seeking incremental change without increased sensitivity risk.

Choosing the Right Whitening Solution

Different whitening options fit different needs: level of staining, sensitivity history, budget, and desired speed of results. The right choice balances effectiveness with comfort and dental safety.

Evaluating Treatment Goals and Expectations

Patients should define specific, measurable goals — for example, lighten two shades for an upcoming wedding or remove years of coffee staining. Professional in-office whitening (single 60–90 minute session) typically delivers the fastest, most noticeable change of 6–8 shades for deep extrinsic stains. Custom take-home trays from a dentist give controlled, gradual whitening over 1–2 weeks and suit people who prefer slower progress or need repeat touch-ups.

Over-the-counter strips and whitening toothpastes work best for mild surface stains and cost less, but expect smaller, incremental improvements over several weeks. Set realistic timelines: rapid, dramatic whitening may require multiple professional visits or combined approaches, while at-home methods need patience. Recommend discussing desired shade and timeline with a dentist to match expectations to a safe plan.

Considering Tooth Sensitivity and Dental History

A history of tooth sensitivity, enamel erosion, recent restorations, or gum disease changes the approach. Those with sensitivity may benefit from lower-concentration gels in custom trays, potassium nitrate-containing desensitizing agents, or shorter in-office activation cycles to reduce discomfort. In some cases, pre-treatment with topical fluoride or desensitizing varnish can improve tolerance.

Existing crowns, veneers, or composite fillings will not whiten, so restorations may need replacement after whitening to match natural teeth. Active decay or untreated gum disease must be addressed before whitening to avoid irritation or uneven results. Dentists should review medical history, medications that affect oral tissues, and prior bleaching reactions before recommending a plan.

What to Know Before Your Whitening Appointment

Patients should expect a short exam, clear costs, and guidance on sensitivity management. They should bring information about restorations and current medications to ensure safe, effective treatment.

Preparing for Your Visit

The dental office will perform a quick oral exam to check for cavities, gum disease, and existing restorations like crowns or veneers. Untreated decay or active gum inflammation typically must be addressed first, because whitening gel can irritate soft tissue and produce uneven results over restorations.

Bring a list of current medications and recent dental work dates. Certain drugs (for example, some antibiotics taken during tooth development) affect baseline tooth color and expectations. If desiring take-home trays, the practice will take digital or physical impressions; expect 30–60 minutes for impressions or intraoral scans.

Avoid heavy coffee, red wine, or tobacco on the day of treatment to reduce immediate staining. If using topical fluoride or desensitizing toothpaste, mention it; the clinician may recommend a specific pre-treatment protocol to minimize post-whitening sensitivity.

Post-Treatment Care Tips

Expect temporary sensitivity for 24–72 hours; over-the-counter potassium nitrate toothpaste or a neutral pH fluoride gel can reduce discomfort. The clinic may provide a desensitizing gel or recommend applying a sensitivity formula twice daily for a week.

Follow a 48–72 hour “white diet”: avoid coffee, red wine, berries, soy sauce, and colored sauces to maintain results. If provided, wear take-home trays as instructed—typically nightly or every other night for a short booster—because follow-up treatments extend longevity.

For restorations, note that crowns and veneers do not whiten; plan to discuss replacement or staining options if color mismatch occurs. Schedule a follow-up appointment or touch-up plan; many San Diego practices offer 6–12 month review and tailored maintenance products.

Long-Term Care for a Bright Smile

Maintaining a bright smile after professional whitening requires consistent habits and occasional touch-ups. Patients should expect to combine daily care, lifestyle adjustments, and periodic professional maintenance to keep results looking natural and long-lasting.

Maintaining Results After Treatment

After in-office or take-home whitening, patients should follow the dentist’s specific instructions about avoiding food and drink that stain for 24–48 hours. Use the prescribed post-whitening toothpaste for the first two weeks to reduce sensitivity and help stabilize shade.

Schedule a follow-up with the dental office 2–6 weeks after treatment to confirm shade stability and address sensitivity. For many, a single professional touch-up every 6–12 months maintains brightness; those who drink coffee, tea, or red wine daily may need touch-ups every 3–6 months.

Use custom take-home trays for quick at-home touch-ups: apply a low-concentration gel (10% carbamide peroxide) for 1–2 nights or a shorter daily application as directed. Track results with photos under consistent lighting to decide when a touch-up is necessary rather than guessing by memory.

Healthy Habits to Prevent New Stains

Reduce stain intake by limiting or modifying consumption of coffee, black tea, red wine, dark sodas, and brightly colored sauces. When drinking staining beverages, use a straw and rinse with water afterward to minimize contact with tooth enamel.

Brush twice daily with fluoride toothpaste and floss daily to remove surface pigments before they embed in enamel. Consider an electric toothbrush for more effective plaque removal, and use an antimicrobial mouthwash if recommended by the dentist.

Incorporate regular professional cleanings every 3–6 months to remove tartar and surface stains that home care misses. For patients who smoke, quitting or switching to less staining alternatives produces the largest long-term improvement in tooth color and oral health.

If sensitivity or gum irritation develops, consult the treating dentist rather than stopping maintenance; they can adjust concentration, frequency, or recommend desensitizing agents. For personalized guidance, patients should contact their local San Diego dental practice to plan an individualized maintenance schedule.

When to Consult Your San Diego Dental Specialist

If teeth staining appears suddenly or is uneven, the dentist should evaluate it. Sudden discoloration can signal internal problems like trauma or infection that need prompt care.

People with sensitive teeth or gum disease should avoid over-the-counter whiteners until checked. A dental exam can identify cavities, exposed roots, or inflamed gums that make whitening uncomfortable or ineffective.

Prior dental work—crowns, veneers, or fillings—often does not respond to bleaching the same way natural teeth do. A specialist can map which restorations need replacement or alternative treatments for a consistent result.

Expectations matter. If someone wants dramatic whitening in a short time, an in-office option may be safest and most predictable. For gradual brightening, a custom take-home kit provides control with professional oversight.

Pregnant or nursing patients, and those with certain medical conditions or medications, should seek professional advice before whitening. The dentist will review health history and recommend the safest approach.

Signs to schedule a consult now:

  • Persistent tooth pain after whitening attempts
  • Uneven color despite repeated products
  • Visible wear, chips, or exposed dentin
  • Recent dental work that might be affected

They can perform an exam, discuss realistic outcomes, and suggest the best plan for comfort and longevity. Call or message a San Diego dental specialist to arrange an evaluation and personalized recommendation.

Frequently Asked Questions

This section answers common concerns about whitening stubborn stains, differences between in-office and take-home options, speed of treatments like Zoom, expected longevity and maintenance, what happens during appointments, and how to pick a reliable provider.

Which whitening treatment works best for stubborn stains from coffee, tea, or wine?

Stubborn extrinsic stains often respond best to in-office professional whitening using higher-concentration peroxide gels and activated light or heat when appropriate.
For deeply set or long-standing stains, dentists may combine in-office whitening with custom take-home trays to boost and maintain results.

How does in-office whitening compare to take-home trays in terms of results and sensitivity?

In-office whitening delivers faster, more noticeable shade changes in a single visit, typically 3–8 shades depending on the system and starting color.
Take-home trays use lower peroxide concentrations over several days or weeks, producing gradual results with generally less acute sensitivity.

Is Zoom whitening a good choice if I want fast results before an event?

Zoom whitening often produces visible improvement in a single 60–90 minute visit, making it a practical option before special events.
Patients should discuss sensitivity risks and realistic shade expectations with their dentist at least a week before the event.

How long do whitening results typically last, and what can I do to maintain them?

Results commonly last 6 months to 3 years depending on diet, oral hygiene, and tobacco use.
To extend results, maintain twice-daily brushing with fluoride toothpaste, floss daily, avoid or reduce staining foods and drinks, and use touch-up trays or over-the-counter maintenance products as recommended.

What should I expect during a professional whitening appointment, and will it be comfortable?

Appointments usually begin with an exam and cleaning, followed by gum protection, application of the whitening gel, and timed activation cycles.
Most patients report mild, temporary sensitivity; dentists offer desensitizing gels, shorter cycles, or adjusted protocols to increase comfort.

How do I choose a trusted whitening provider—what should I look for in patient reviews and credentials?

Look for a licensed dentist with specific experience in cosmetic or restorative dentistry, positive patient reviews mentioning comfort and predictable results, and before-and-after photos.
Check that the practice explains risks, provides a customized treatment plan, and offers follow-up care or maintenance guidance.